Archives of Loren Williams Fly Tying Tutorials.
LW's Bugs' Revenge
I am quite excited about this creation. Obviously, I say it knowing that someone, somewhere will rebutt with "I have been tying that exact same pattern for years." While I am sure someone has, the construction of this fly came to me after a number of stirring thoughts so I am laying claim!
I have always been a fan of flies like the venerable GRHE and the super-simple Walt's Worm. There is something about natural fur that appeals to me and since I like to play with successful patterns, adding bits and pieces that make me feel confident, I like to honor the original name within the new creation (Sexy Waltz for example). LW's Bugs' Revenge is no different as this fly is based on both the GRHE and Walt's Worm.
As we all have, I have had issues with ribbing being broken and unwrapping. There are several common practices to boost a rib's lifespan such as counteribbing with wire or mono. However, I have had them fail too and they tend to bind down the fur-killing lots of the appeal of the natural fibers. I have been thinking allot about some new tying techniques that may give similar effects but in a more durable fashion. The Revenge is the first in that line. You will see when studying the tutorial that I have reverse-engineered the ribbing process by placing the more delicate mylar on first as the body. Then, by building a sparse dubbing loop using the very durable Sulky thread to form the loop, I am able to make a strong, appealing fur rib over the mylar. The resultant appearance is similar to a tinsel-over-fur rib, but I offer that it is more succulant and far more durable. As I continue to play with this aplication the more excited I get!
Let's have a go shall we?
MATERIALS
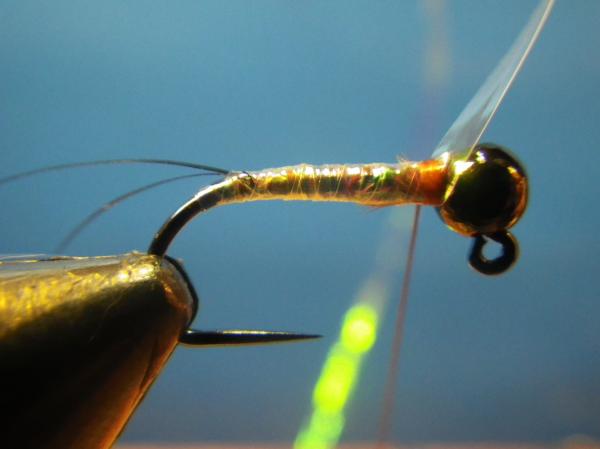
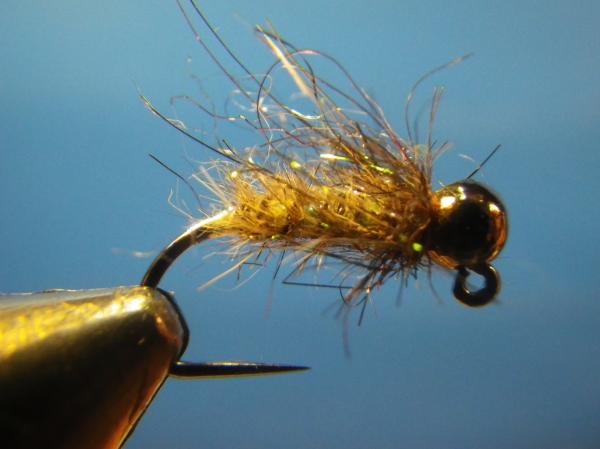
Hook: TMC 403BJL #12-#16
Bead: Black nickel slotted tungsten
Weight: Lead wire
Thread: Brown 6/0
Rib: Black Sulky Silver Metallic thread and natural hare's mask together in a dubbing loop
Body: Large pearl Mylar tinsel
Thorax: UV bronze Siman Peacock dubbing
Click on photos to enlarge!
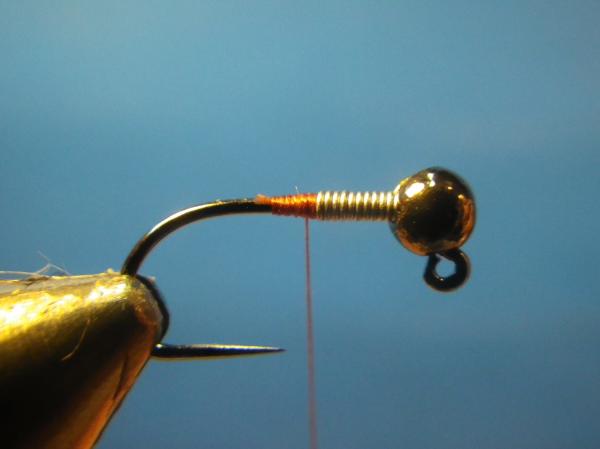
Slide on the slotted bead, add ten wraps of lead wire and start you thread behind the lead coil.
Proceed to cover the shank and lead with smooth layers of thread. Stop with the thread in the middle of the shank.
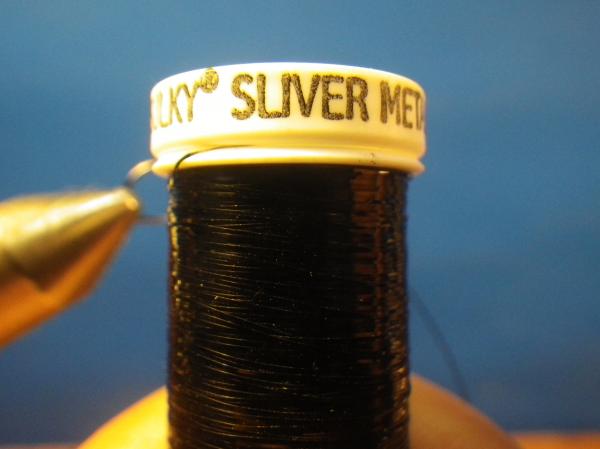
Black Sulky Silver Mettalic...
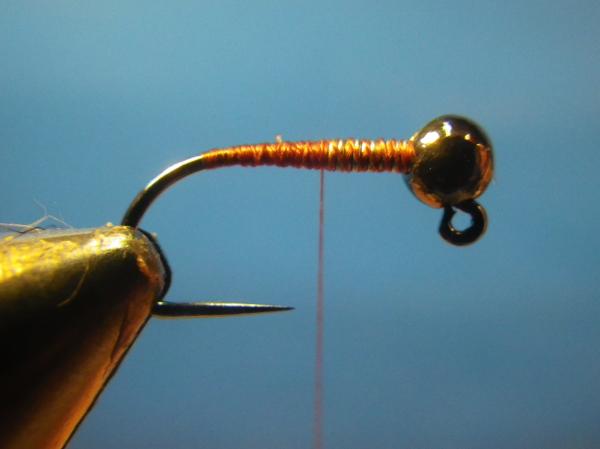
Snip a long section of black Sulky (the more flies you plan to tie, the longer this section can be-within reason). Double it and secure in the middle of the shank.
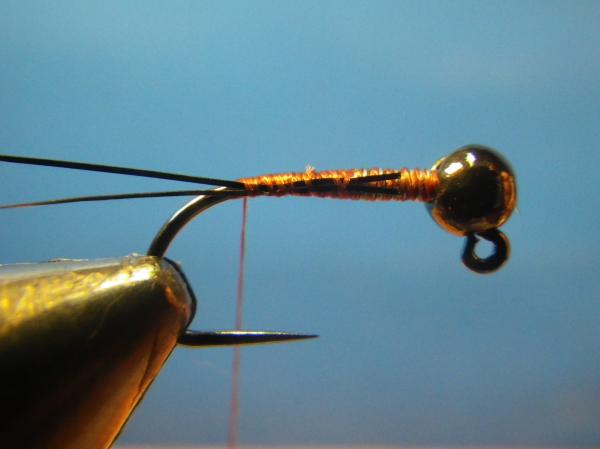
Bind the looped Sulky to the rear of the hook.
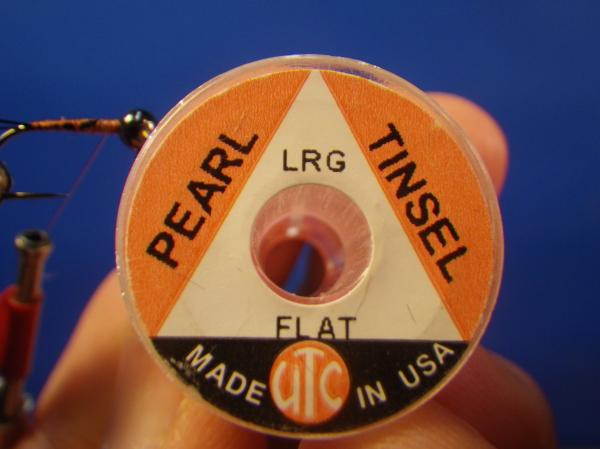
Large pearl Mylar tinsel..
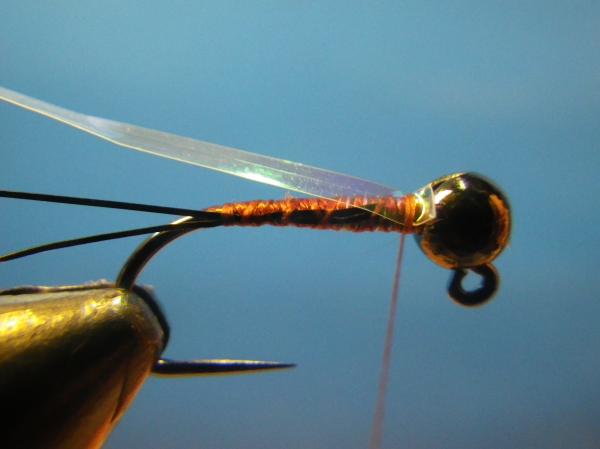
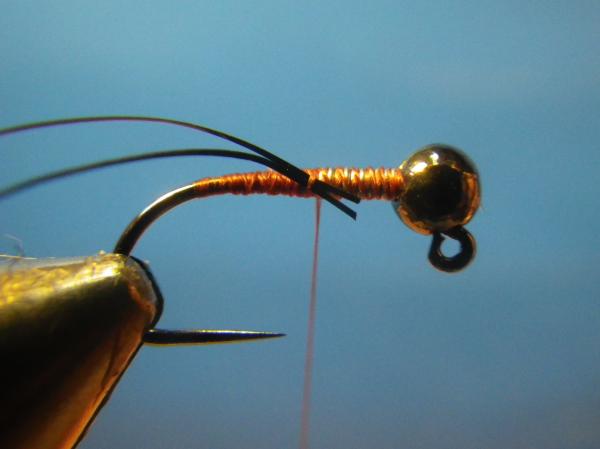
Snip a section of mylar (again, the more flies you intend to tie the longer the section to minimize waste). Tie it in immediately behind the bead.
Wrap the mylar to the rear in tight and slightly overlapping turns. Make two turns beyond (and under) the location of the Sulky loop to form a small tag.
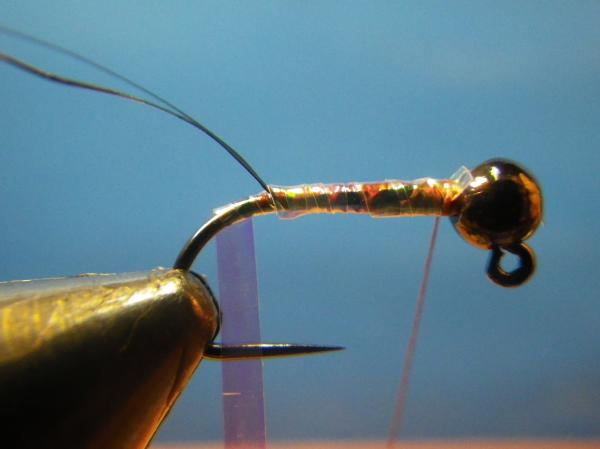
Next, wrap the Mylar forward, over the existing wraps-all the way to the bead. Secure behind the bead with a few thread wraps and snip the excess. This forms a smooth two-layer Mylar body.
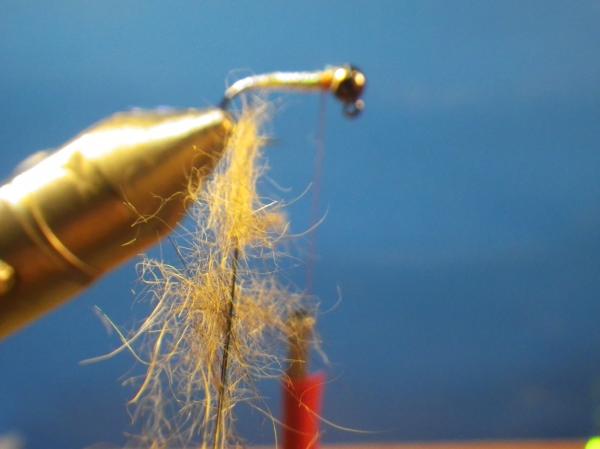
Insert your dubbing spinner into the loop and insert a sparse layer of hare's mask dubbing along its length. Do your best to keep the dubbing an even density throughout.
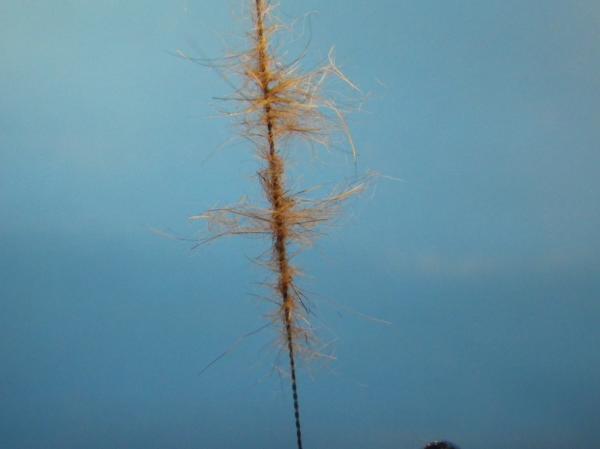
Spin the loop with vigor. I have found that I can get multiple flies from a loop once it is spun.
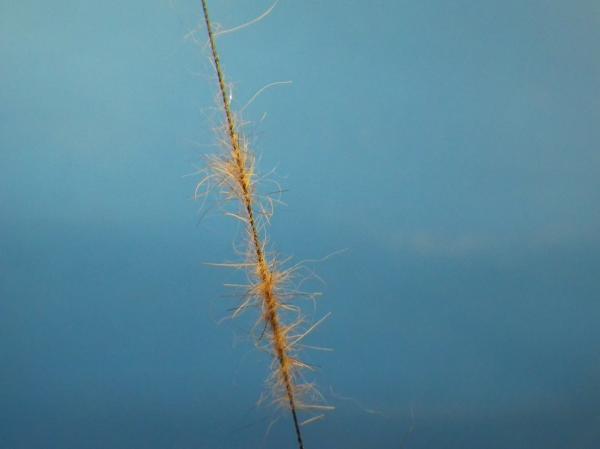
Once spun, use your fingers to stroke out any of the fibers not trapped in the loop-usually this will thin the dubbing brush by a third or so-perfect!
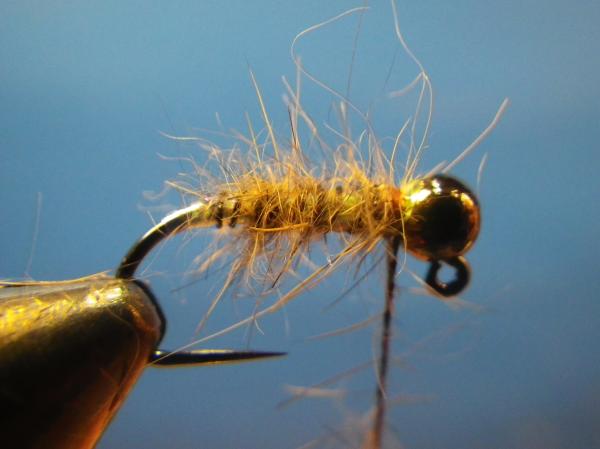
Now, wrap the sparse dubbing brush forward in even, and almost touching wraps. I want the Mylar to show though but no overpower the body. The black Sulky should also be evident when you look closely-this will give the proper appearance once wet.
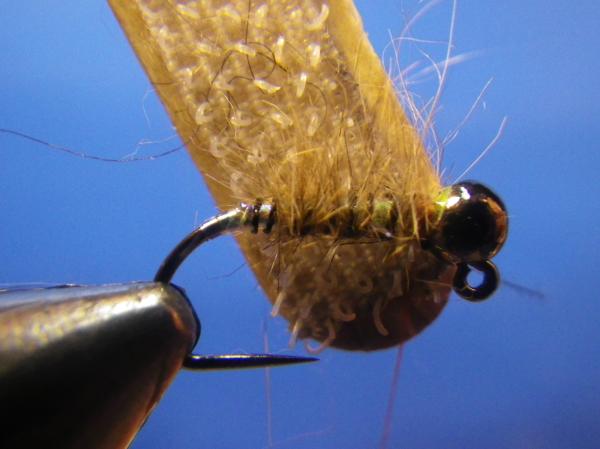
Take your dubbing brush or Velcro and brush the body from bottom to top on both sides. You can omit this process if you prefer a messier fly.
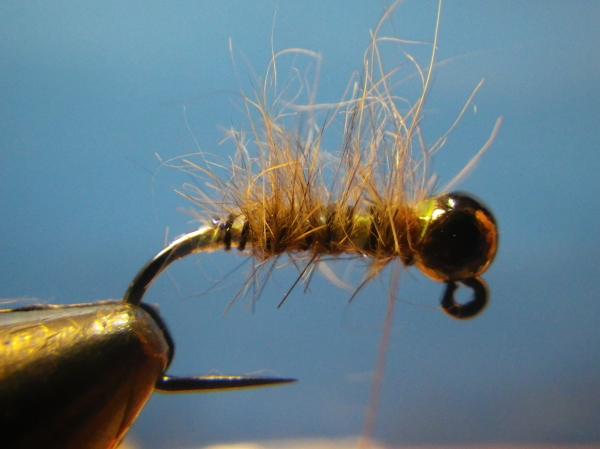

Trim a nice taper from front to rear. I like to have a go at this from a few angles, your mileage may vary.
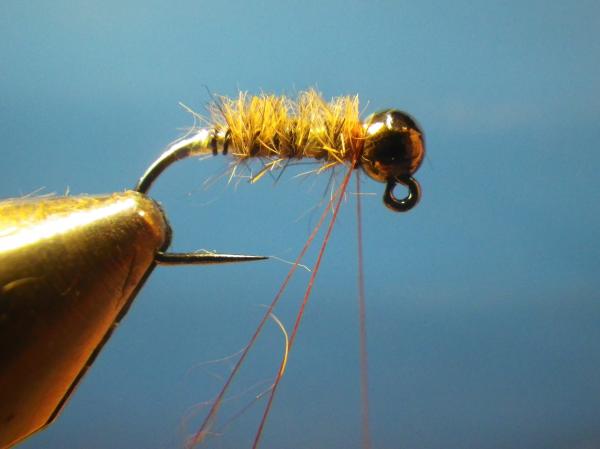
Now, form a small dubbing loop with your brown tying thread immediately behind the bead. It need not be more than an inch or two in length as you will only need to make a few wraps.
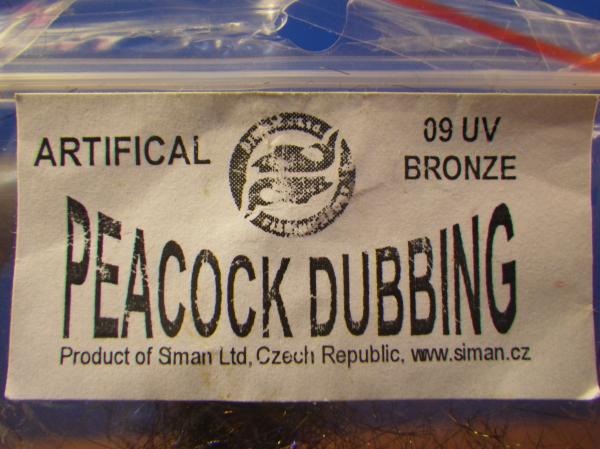
UV bronze Siman Peacock Dubbing...
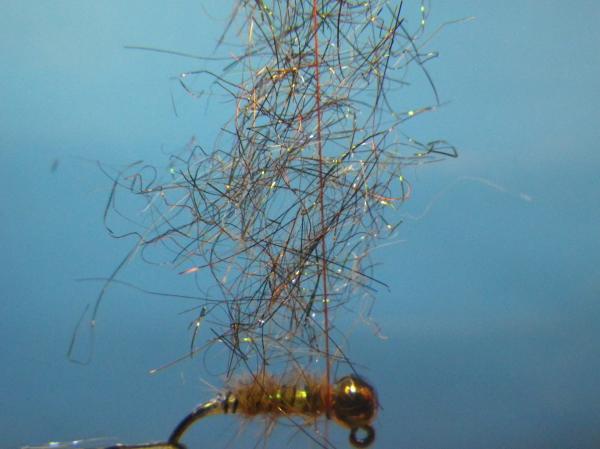
Insert a few sparse pinches of peacock dubbing into the loop.
Give the loop a good spin to transform it into a brush!
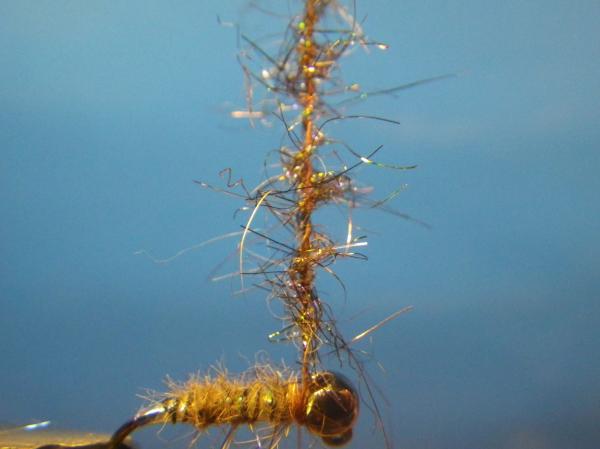
Make two wraps of the dubbing brush tightly behind the bead. I do like to pull the fibers to the rear between wraps. Secure the brush with a wrap or two of thread and clip away the excess. Whip finish the thread ehind the bead. Almost done!
Revisit your Velcro and brush out the collar to loosen all the fibers. Don't be timid!

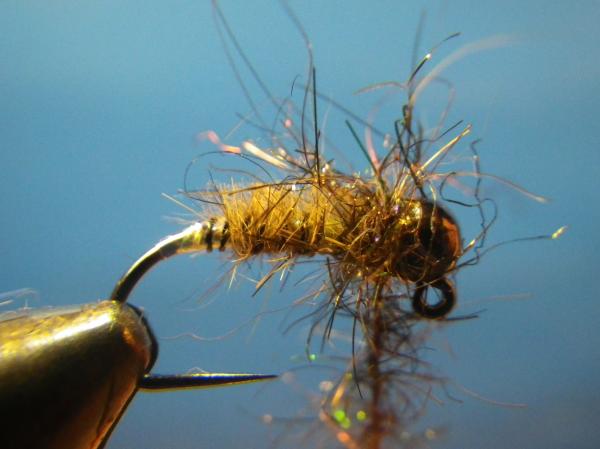
Finally, trim the collar fibers to be about twice as long, or so, as the rib fibers. Clean up any rib fibers that may have loosened wth the last Velcro affair. Once trimmed to your approval-go fish! I hope you, and the fishies, enjoy this fly!