Archives of Loren Williams Fly Tying Tutorials.
LW's Sexy Waltz
Fly and Photos by Loren Williams
The Walt's Worm is a venerable Eastern US pattern developed by Walt Young, as I understand, to imitate various cranefly larvae. This version is how I dress this fly for highly pressured fish, especially in locations where the standard pattern is prescribed heavily by fly shops. The SWW as produced trout, grayling and whitefish in Europe, Tasmania, New Zealand, all across the Rockies, and in southeastern US as well!
I do fish this pattern blind, as an attractor, and it accounts for many, many fish over the course of a season. I have been tying and fishing this pattern for a number of years now with minor adjustments as new materials are discovered. Most effective sizes are #10 and #12.
With this pattern I introduce a new ribbing/body material from Slovakia and supplied in the US through Performance Flies. Pearl Quill Body makes a durable rib with an exciting color and sheen which, given it's place in the color spectrum, retains visibility under a broad range of depths and conditions.
Obviously, I have removed the imitative qualities from the original pattern but that is OK by me. I like to stand out in a crowd!
MATERIALS
Hook: Mustad R50X #8-#14
Bead: Gold Tungsten
Weight: Lead wire
Thread: Danville 6/0 Fluor. Red
Rib: Fly DK* Pearl Quill Body
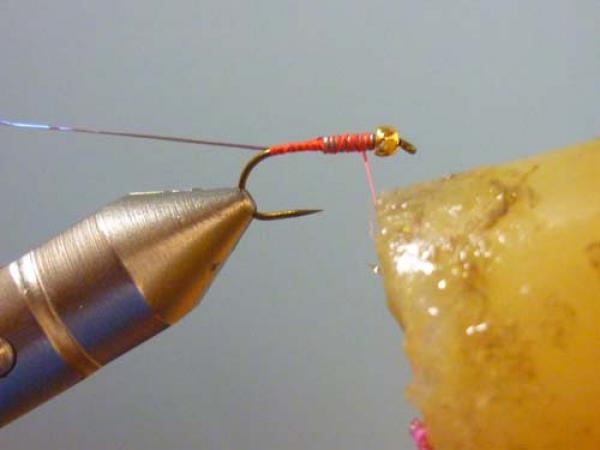
Body: Hare's Mask with clear Antron mixed in
Click photos to enlarge!
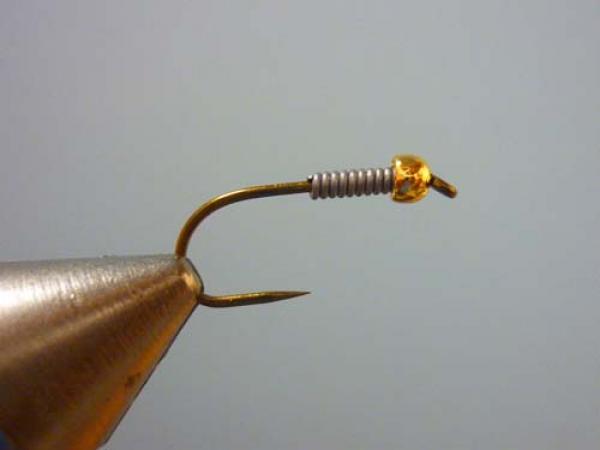
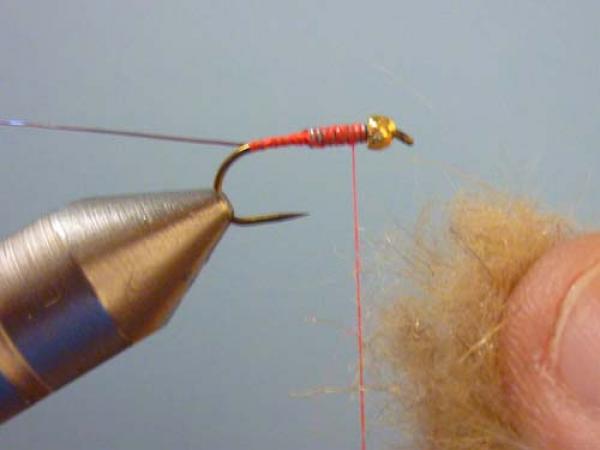
Place beaded hook firmly in your vise. Attach 8 wraps of lead wire-sized to match the diameter of the hook's wire.

Attach thread and bring it to the rear of the hook.

Select ribbing. You can purchase this material from Kevin Compton at Performance Flies (kevind.compton@gmail.com)
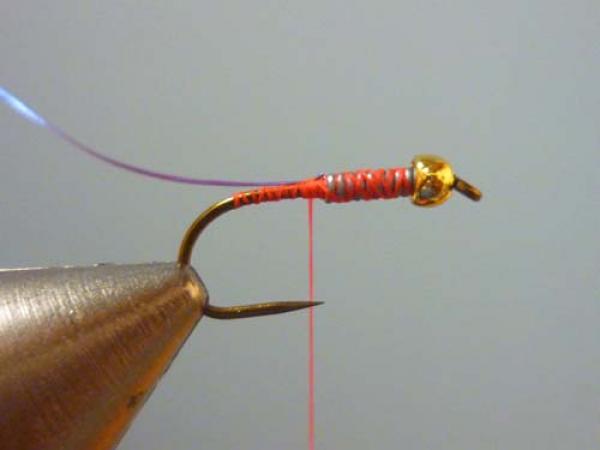
Secure ribbing to far side of hook.
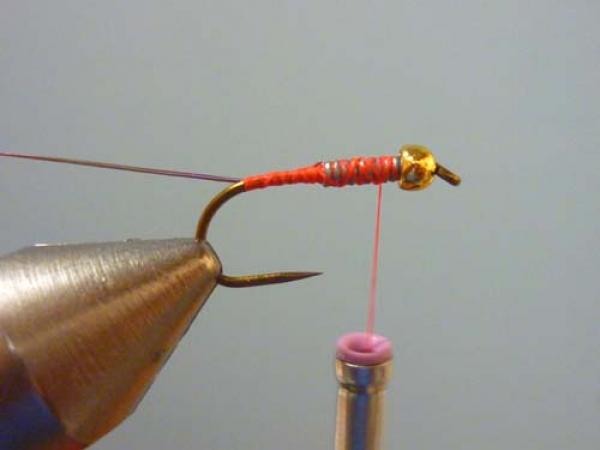
Leave thread forward.
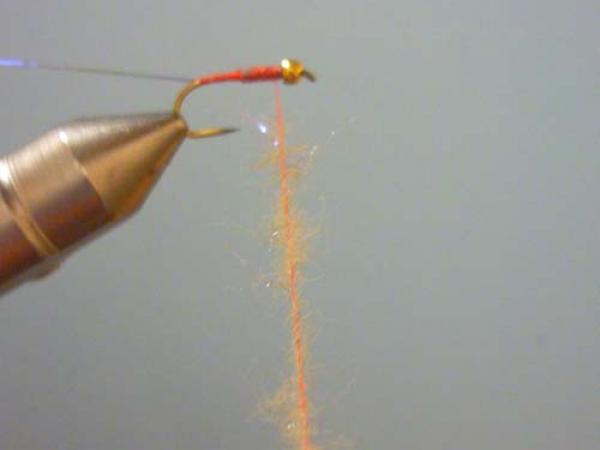
Apply a tacky wax such as Loon's Hi Tack Swax
Gently touch the blended hare's mask to the thread allowing the wax to grab what it will. This allows the tier to create a fuzzy or spiky fly with a minimum of dubbing. The number of layers will decide how much underbody shows through.
Spin the thread to trap the fur...
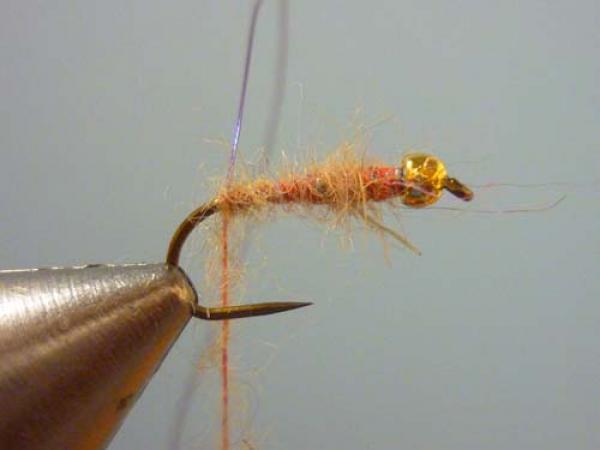
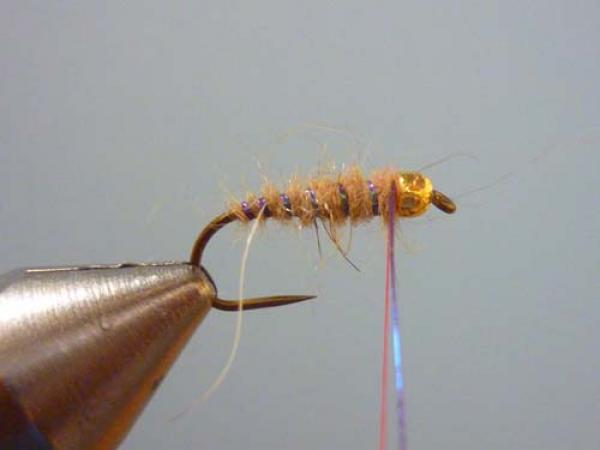
Wrap back to the ribbing and make a single turn behind it. This will help prevent it from falling off the rear when wet and slim. You can see, with one layer, plenty of underbody is visible.
Wrap forward to the bead. Second layer all but hides the underbody...some will bleed through when wet. If I wanted total opaqueness I would shoot for 3 layers.
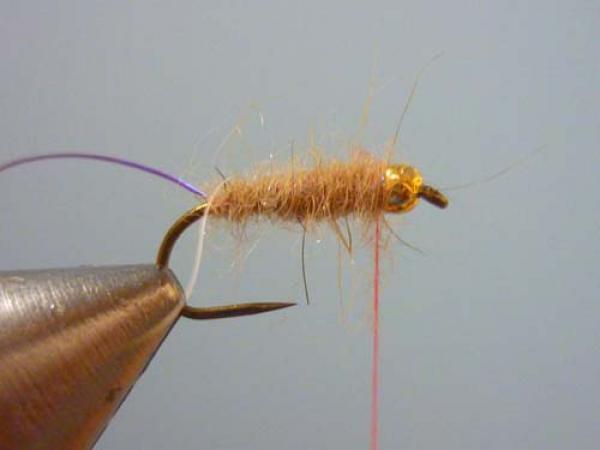
Reverse-wrap the ribbing. Last wrap goes in front of the thread from the near side of the hook. One thread wrap secures the ribbing. Clip excess.
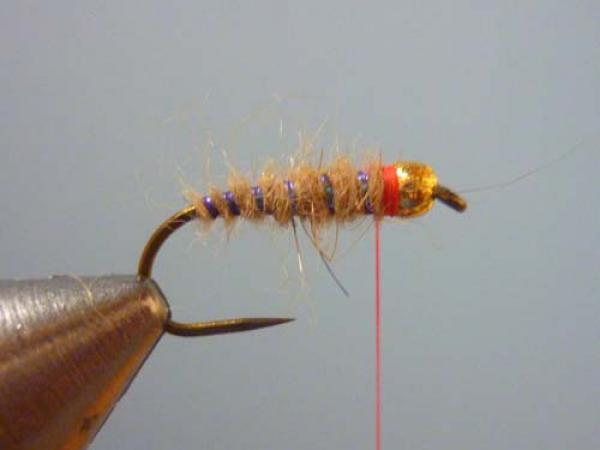
Build a narrow hot spot with the thread and whip-finish.

A completed Sexy Walt's Worm!