Archives of Loren Williams Fly Tying Tutorials.
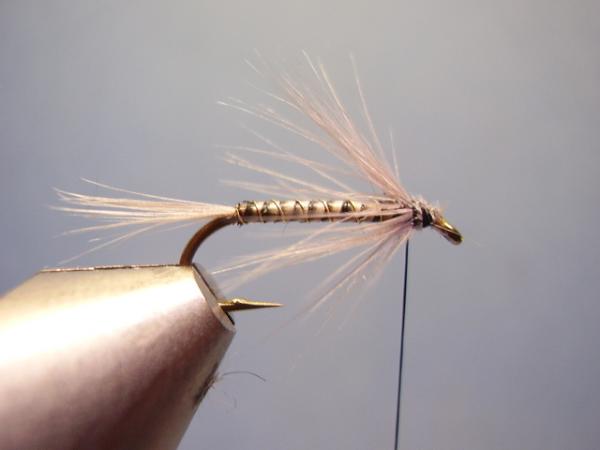
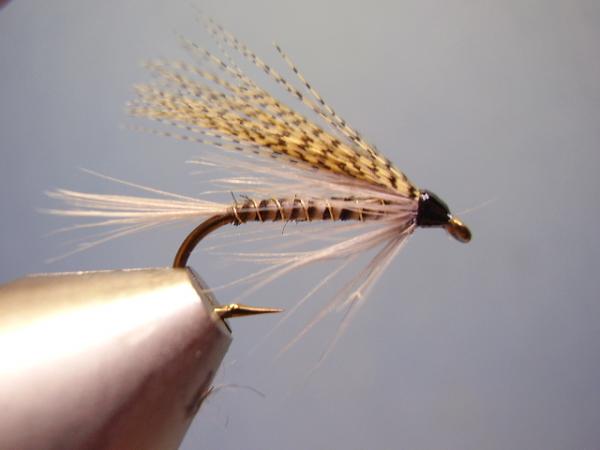
Quill Gordon
Fly and Photos by Loren Williams
The Quill Gordon wet fly is a very typical Catskill Region wet, comprised of hen hackle, peacock stem, and a rolled fiber wing of wood duck flank. Supposedly imitating the Epeorus mayfly of the same common name, I feel this pattern is better served as a searching wet fly, yet very imitative of some caddisflies and, in smaller sizes, stillwater callibaetis species. The Epeorus, and its early hatching cousins all have starkly slate colored wings with little to no venation. It is not until the drakes and March Browns start to show that speckled wings become prominent in the Eastern US. I can only assume that Mr. Gordon used flank on his early dry fly, which carried to the wet version shown here, because of tradition and supply.
In any event, this is a classic and a very functional fish catcher as are most wet flies. Important to tying it well are the skill used in dealing with stripping and trying peacock herl stems and in mounting the rolled fiber wings. Neither are impressively difficult once the fundamentals are presented. You want to pay close attention to proportion, head size, body-hackle-wing transitions and in making sure that the wing is mounted atop the shank.
MATERIAL LIST
Hook: Mustad 3906B or similar 1XL standard wire hook
Thread: black
Tail: Medium dun hen hackle fibers
Rib: fine gold or silver wire (optional)
Body: stripped peacock from the eye
Hackle: Medium Dun hen hackle collar
Wing: natural wood duck flank fibers
Click photos to enlarge!
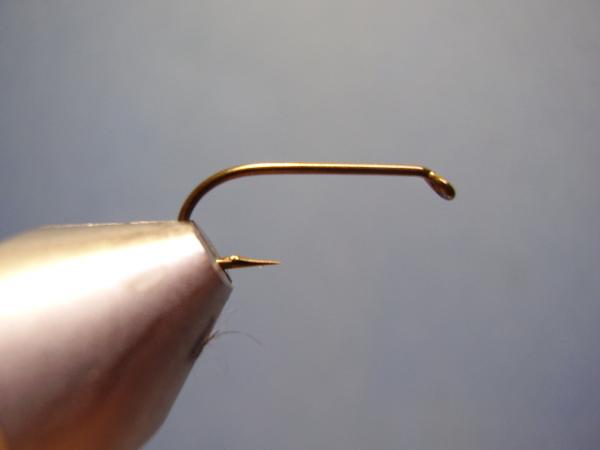
Place the debarbed hook in your vise.
Start the thread behind the eye and lay a base along the shank, ending between the point and barb.
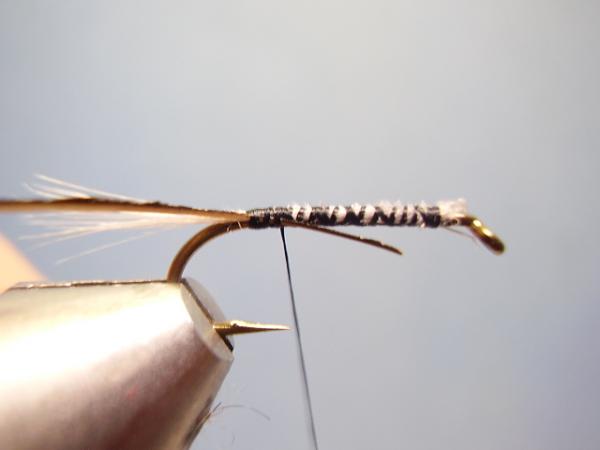
Select a large hen hackle from the bottom (big end) of the cape.
Stroke the barbs perpendicular to the stem and pinch a healthy section.
With your other hand, grasp the tip of the feather and quickly snap it toward your chest, this will leave the bundle of barbs neatly in your fingers with their tips aligned.
Measure the tips to be equal to the hook shank (not entire hook as with dry flies).
Hold the barb bundle slightly to your side of the hook shank and...
...use the thread to torque them into position on top of the hook.
Bind them forward to just behind the eye.

Clip the excess.
Return your thread to the rear.
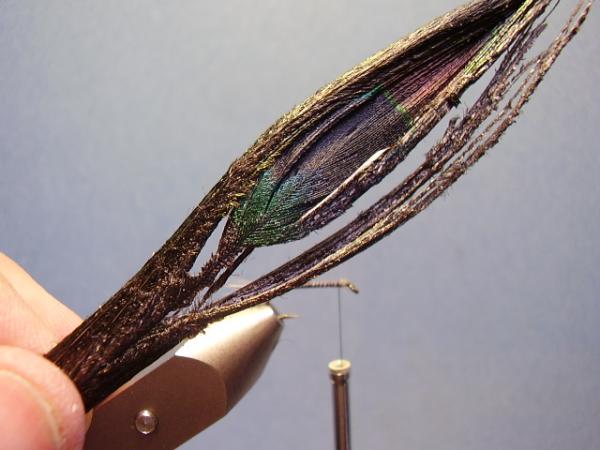
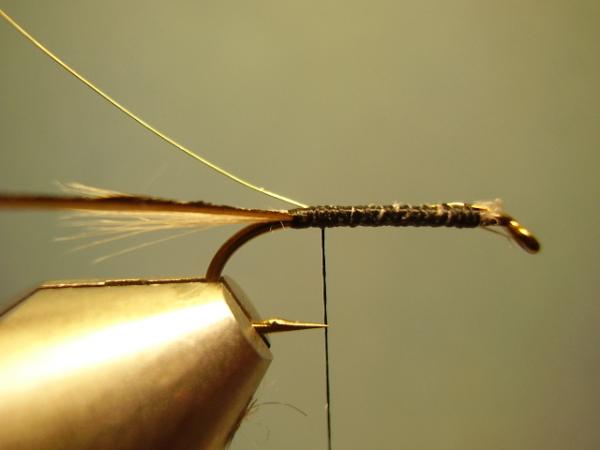
From a waxed peacock eye (I do this myself by dipping the eyes into melted paraffin) select a single herl using your bodkin.
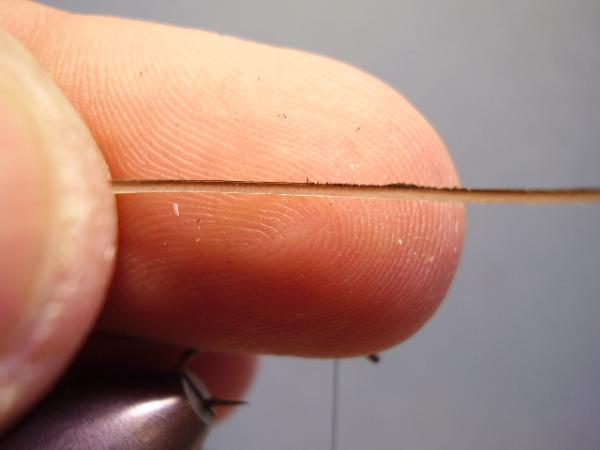
With your fingertips, remove the wax and with it will come the flue. You will be left with a clean, shiny stripped herl. Notice the dark and light leading edges.
Tie the stripped herl in by the tip, with the dark edge on top.

Advance your thread forward. You are doing this to be sure the underbody remains smooth.
Select a short piece of fine gold wire and secure it at the front and bind it to the rear on the far side of the hook.
Once at the rear, bring your thread forward yet again.
Select a hen hackle whose barbs are about equal to the angled distance between the hook eye and hook point.
Remove the base fuzz and stroke the barbs perpendicular to the stem. This will expose the tip.
Tie the feather in by the tip with the underside facing up.
Snip off the tip.
Lay a very thin base of cement over the tread wraps.

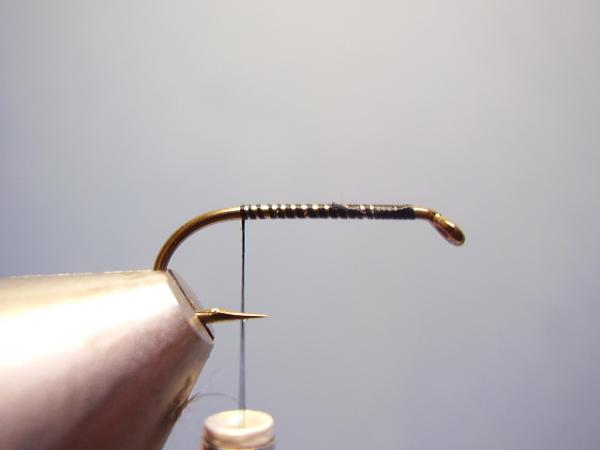
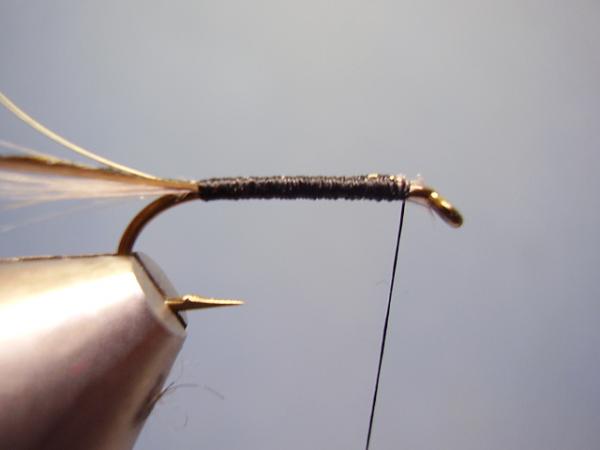
Wrap the stripped peacock forward in touching turns so that the dark edge is to the rear. I find it easiest to use hackle pliers for this job. Secure it at the front with 2 wraps and snip the excess.
Counter-rib with the fine wire in open and even turns to add durability. Secure at the front and clip the excess.
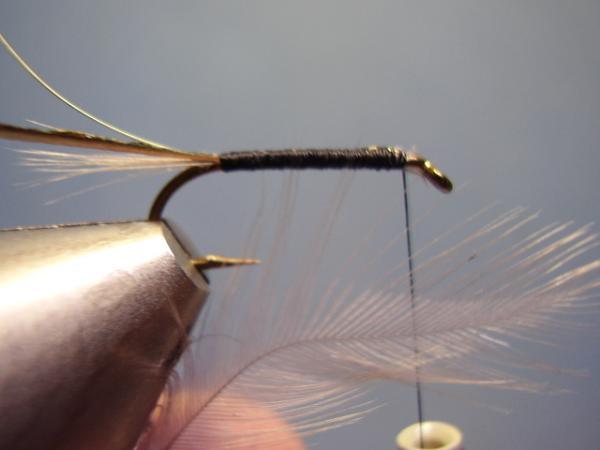
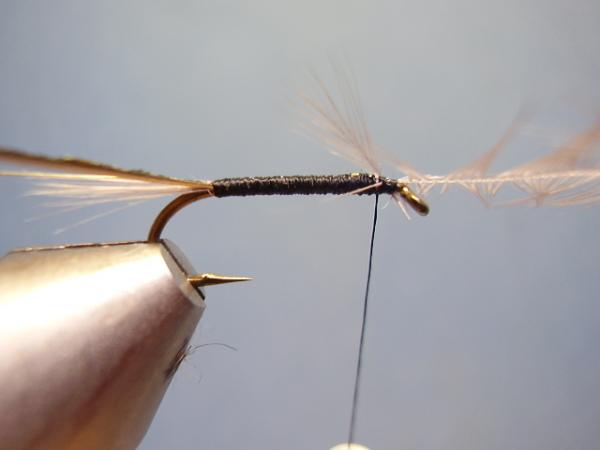
Lift the feather and advance the thread forward of it.
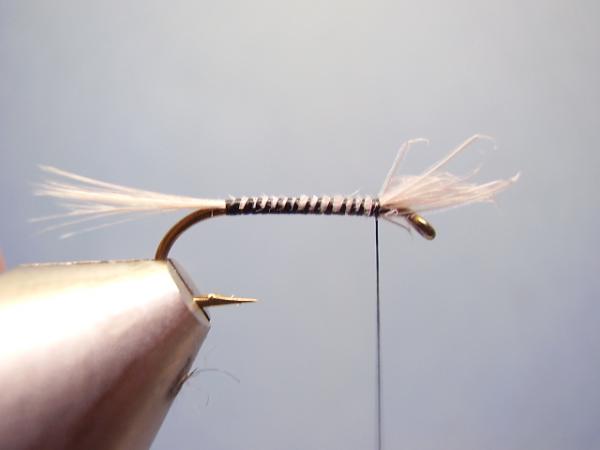
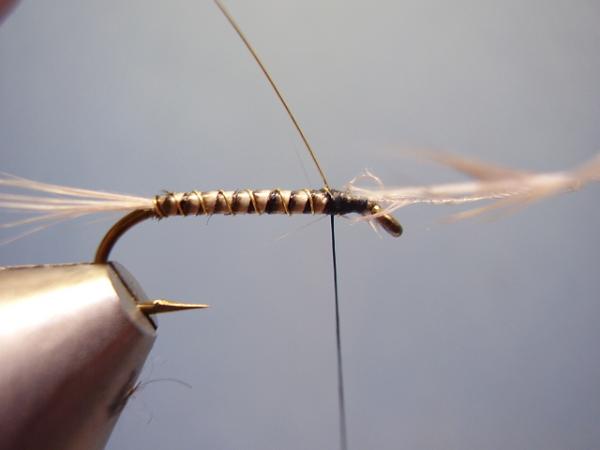
Take three turns of hackle around the shank. Be sure your wraps start where your body ends--you do not want an unsightly gap of thread between the peacock body and hackle.
Pull the fibers back ...
...and bind them down forcing them to the rear and laying a base for the wing.

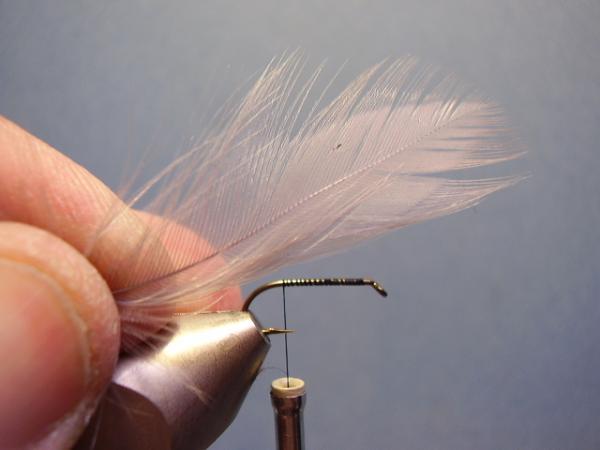
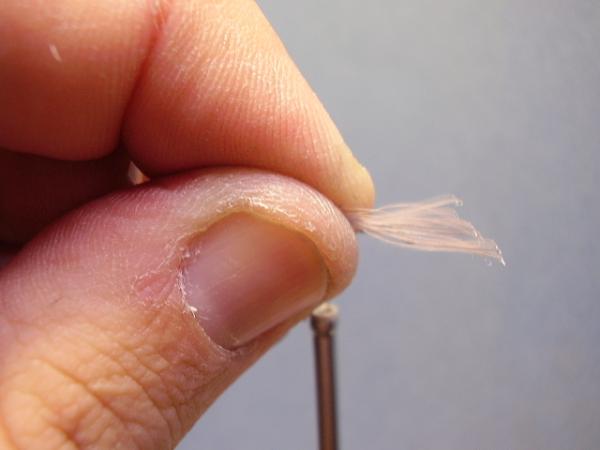
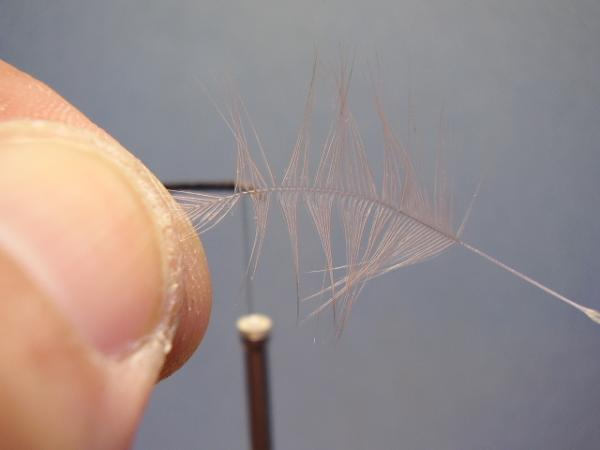
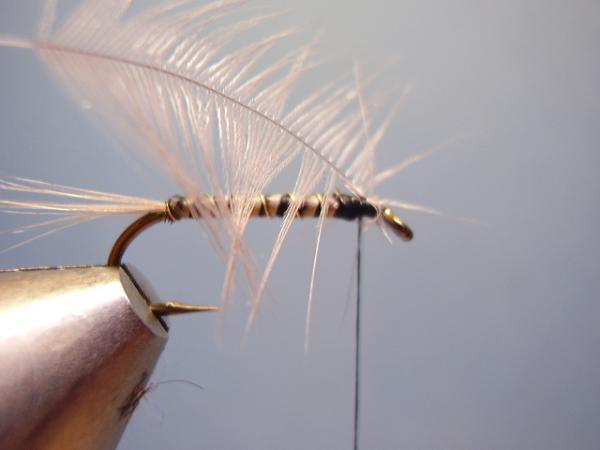
Select a nicely marked natural wood duck flank feather whose center quill does not extend to the end of the feather. You want bare barbs equal to, or greater than, the length of the hook so that the wing is not too rigid.
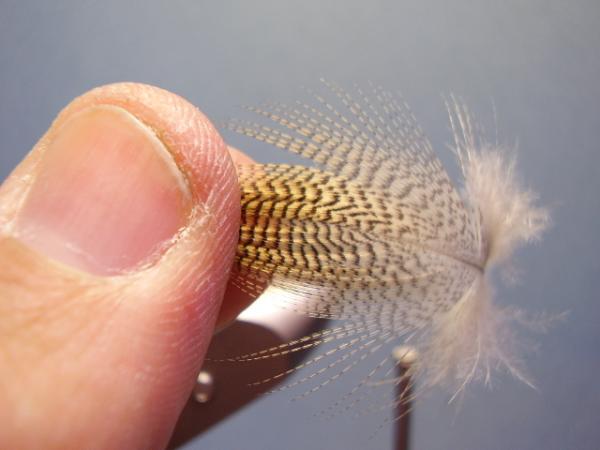
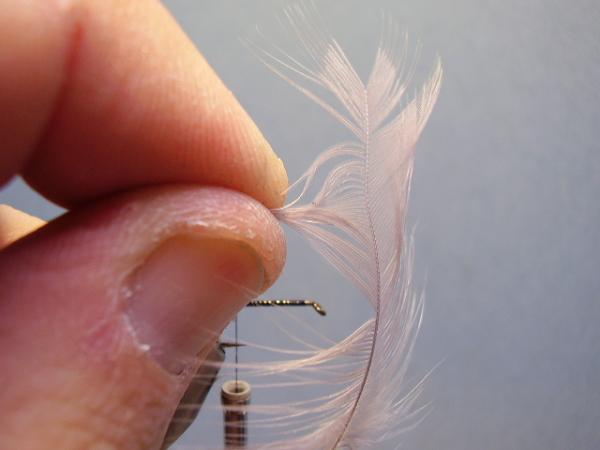
Gather the fibers together at the tip and get a firm grasp.
With your other hand, stroke the feather toward the base. This will separate the "shorts."
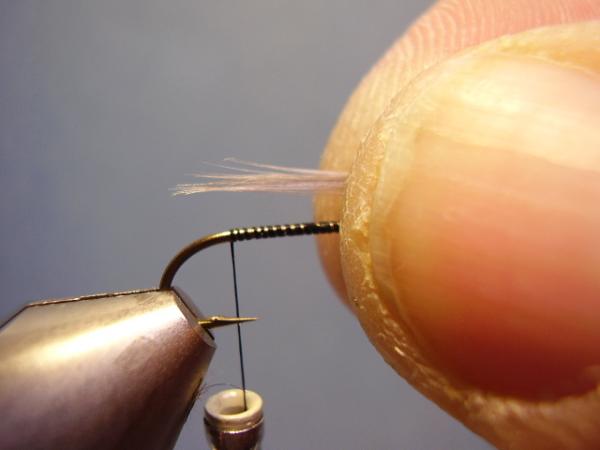
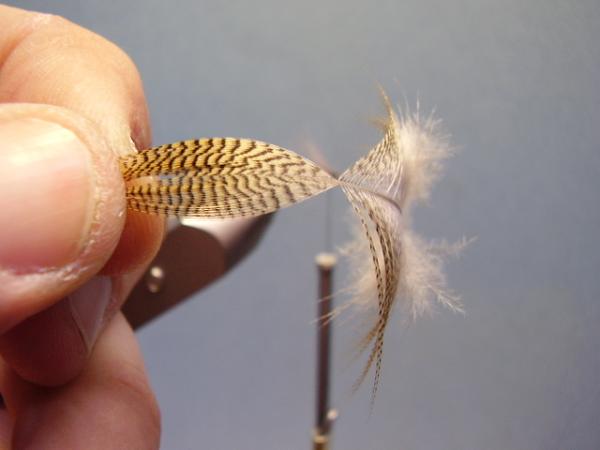
Gather the remaining barbs, who are all even at the tips, and roll them into a single unit. Measure them to be as long as the hook and position them atop the hook.
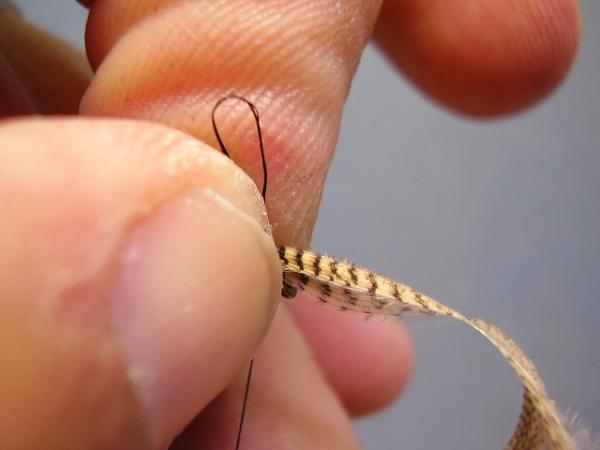
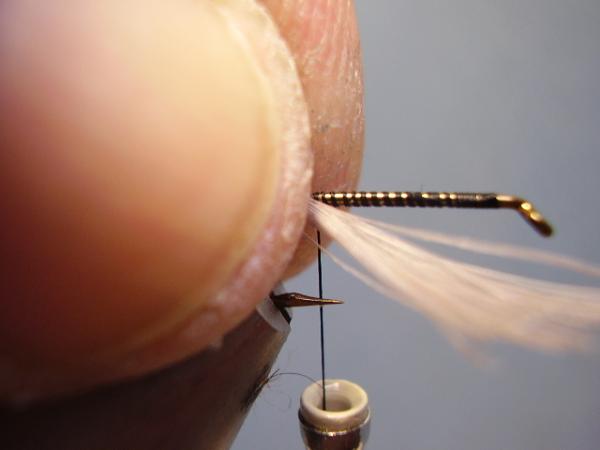
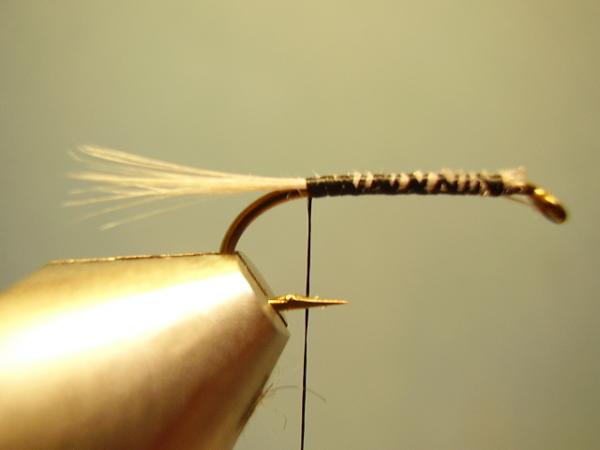
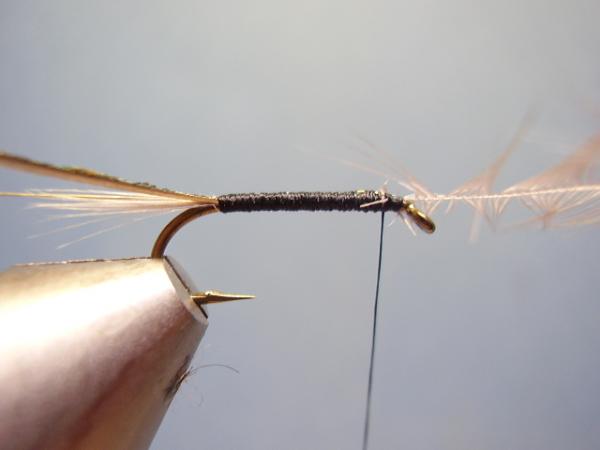
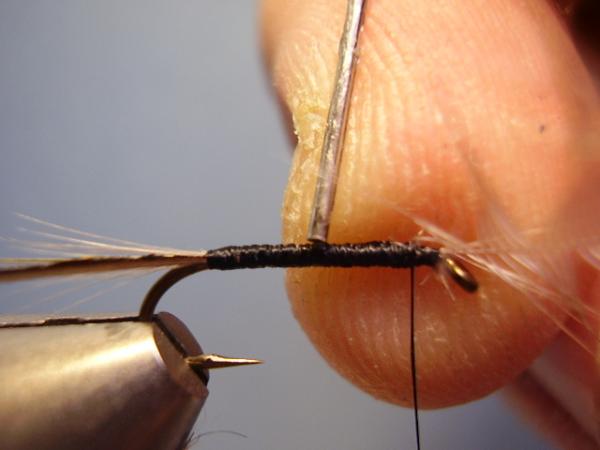
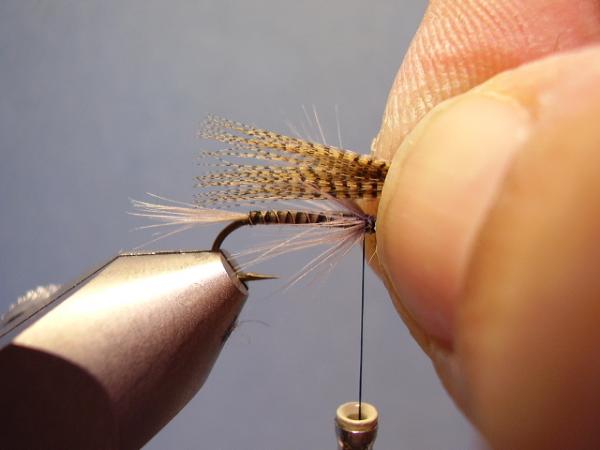
With two quality pinch-wraps, secure the wing to the top of the hook shank directly above the last wrap of thread used to force back the hackle--no gaps!
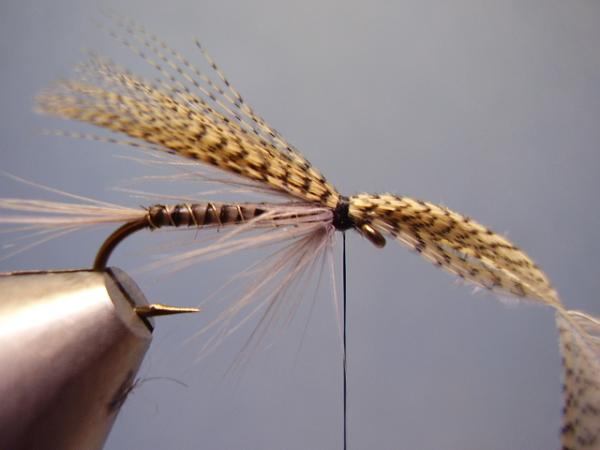
Take two more tight wraps forward to set the wing. Check for length...adjust if needed.
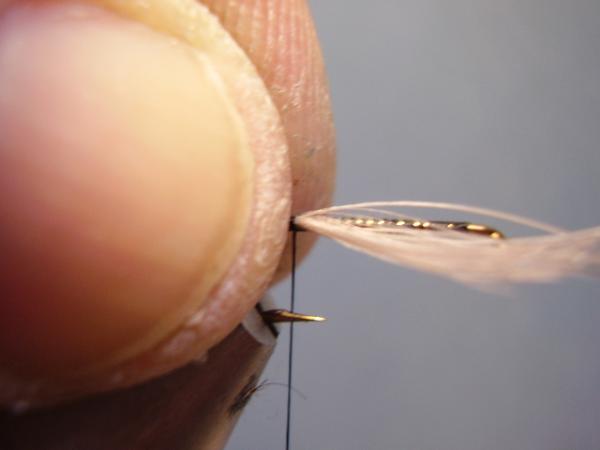
Clip the excess.
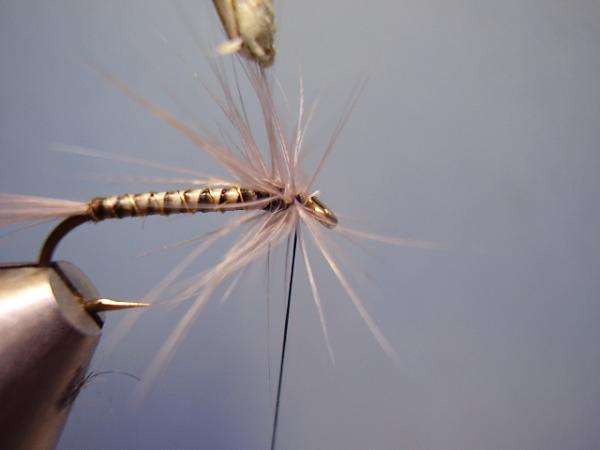
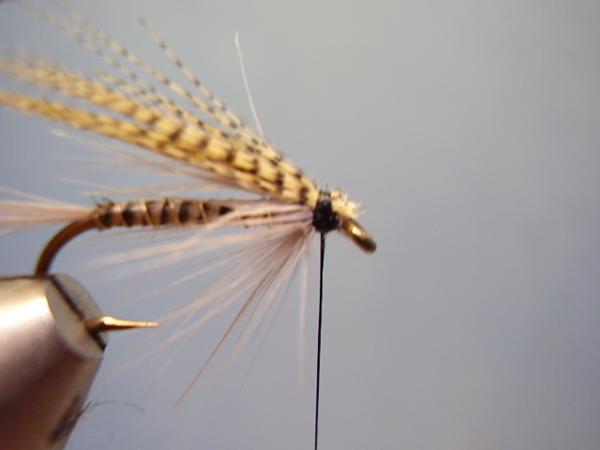
Built a neat head and be sure that the peacock body, hackle collar, and wing all transition at the same location. NO GAPS!
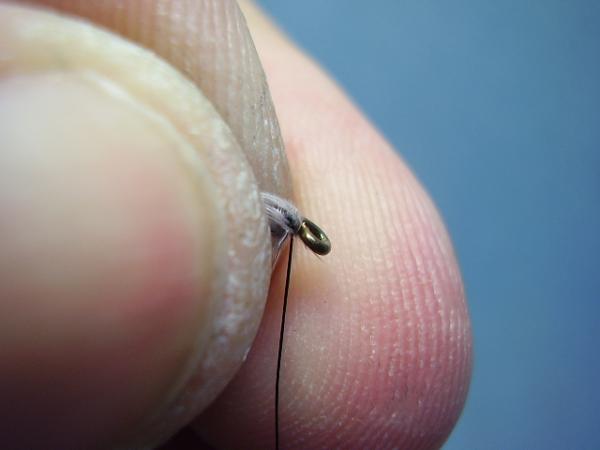
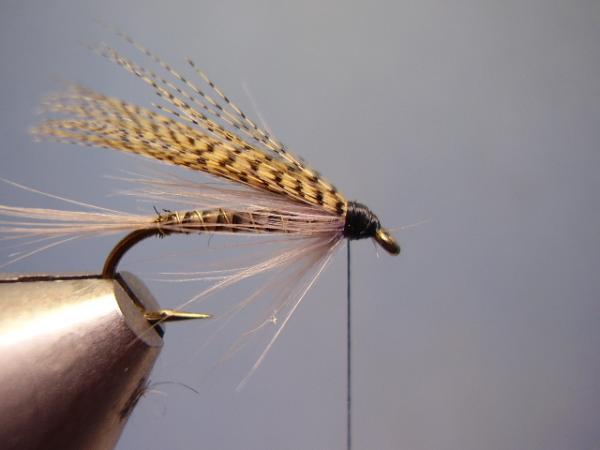
3 coats of HAN later and you have a completed Quill Gordon Wet Fly!