Archives of Loren Williams Fly Tying Tutorials.
Yarn Indicator
Photos and Indicator by Loren Williams
Strike indicators have become a very important tool to the modern fly angler. Akin to other aids such as rifle scopes, compound bows, and rangefinders, strike indicators allow anglers to be more successful at what they do. While not a cure-all by any stretch, those that understand their uses and limitations will find that indicators do indeed assist an angler in detecting strikes.
However, these little tools have become expensive through demand. While I encourage patronizing your local fly shop for most items, I think I'd be remiss if I did not offer a "do-it-yourself" alternative for my readers. I use these yarn indicators when I guide as they serve a few important purposes to both myself and my guests. Therefore I appreciate the ability to build these myself for both economical and logistical reasons.
Using the directions below, you too can build your own indicators in any color or size imaginable for just pennies! Let's get started....
Material List
Braided Macrame' Yarn
Large Sturdy Bodkin
Heavy Tooth Metal Pet Comb
Sharp Scissors
Needle-nosed Pliers
Small Rubber O-Rings (1/4" and smaller)
Flat Waxed Nylon Thread
Loon Outdoors' Hard Head
Loon Outdoors' Hydrostop
Click on photos to enlarge!

Cut a short section of braided macrame' yarn from the skein (which will provide several lifetime supplies of indicators to you and your friends). You will need about 5-inches per indicator.
Using a stout bodkin, unravel the braids at one end. Only work loose enough for one indicator.
Note: you can leave the next few steps for later and unwravel after the indicator is secured using thread and O-ring.
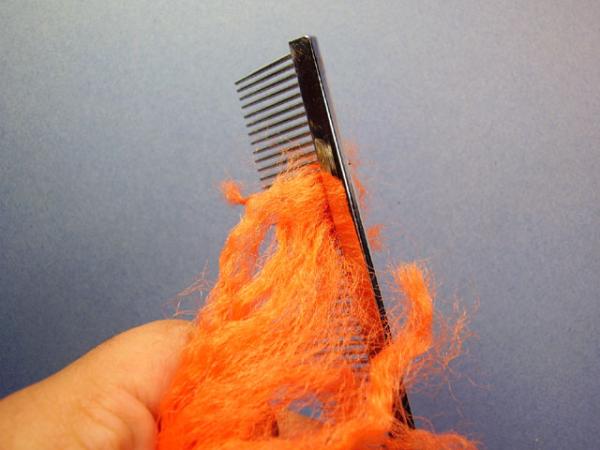
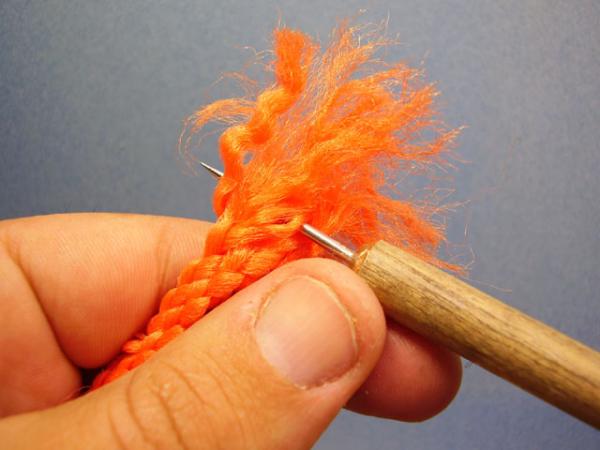
Using a metal pet comb, brush through the open braids.
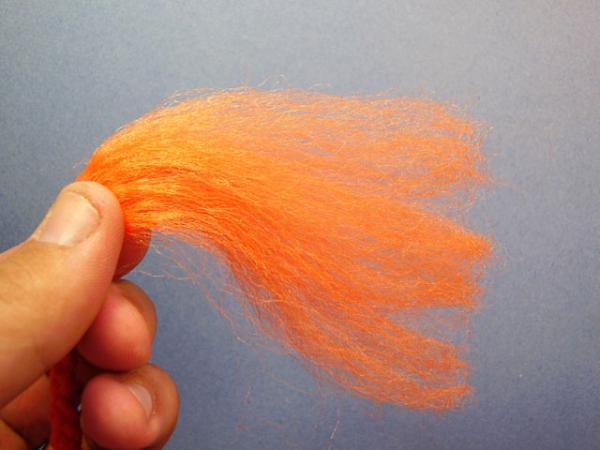
This is what you want to end up with.
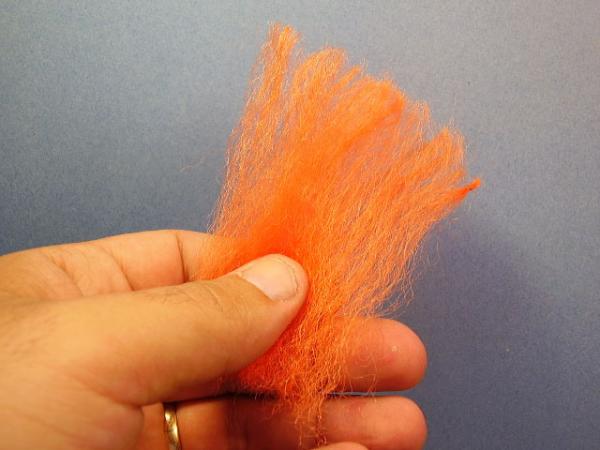
With sharp scissors, remove the brushed-out section from the rest of the rope.
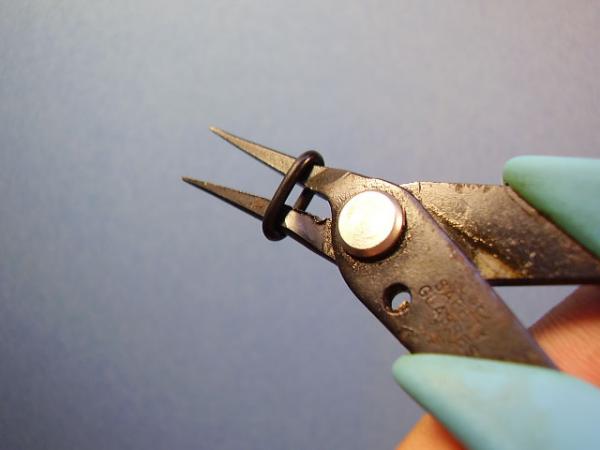
Now, get a small rubber O-ring and slide it onto a pair of needle-nosed pliers. Shown are my Xuron pliers that I also use to debarb my hooks with.
Grasp one end of the yarn with the pliers.
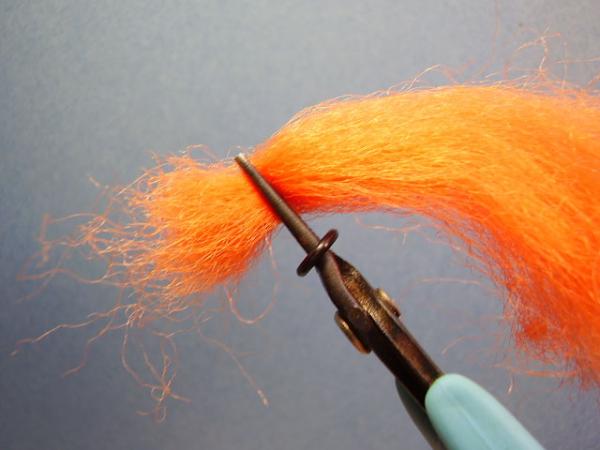
Slide the O-ring off the pliers onto the yarn
Continue to slide the ring past the doubled section of yarn.

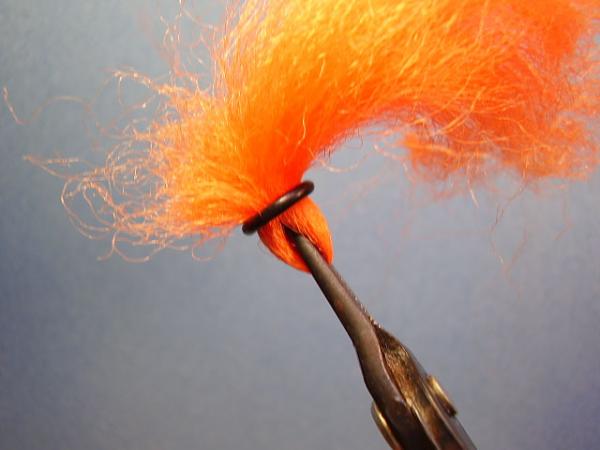
Slide the o-ring into position in the middle of the yarn hank.
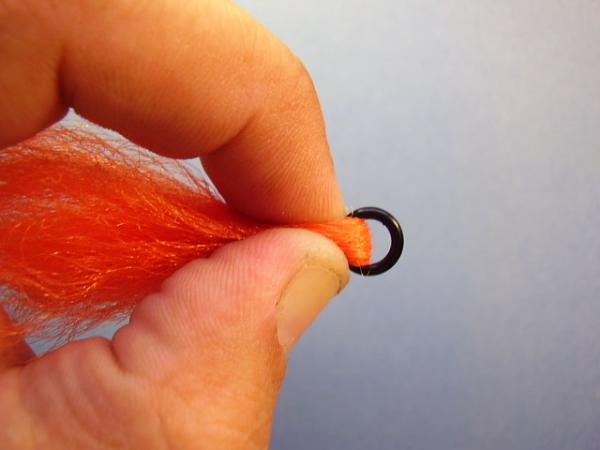
Double the yarn around the o-ring and gather the yarn tightly.
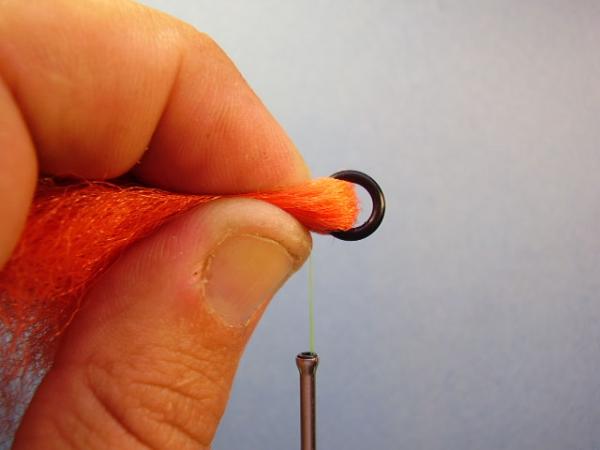
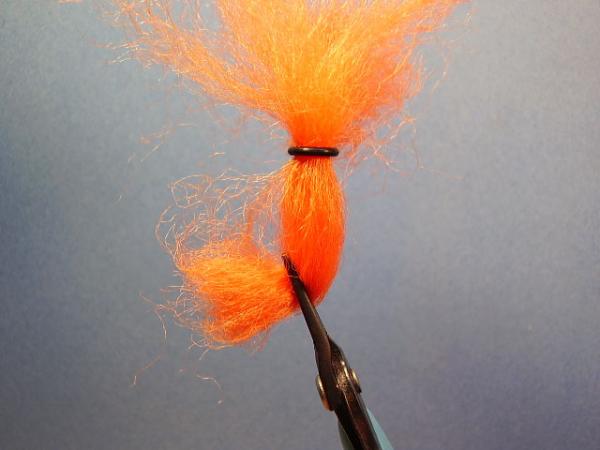
Start the tying thread immediately behind the o-ring using the fingers of your non-bobbin hand to hold the tag end in place. Use a standard jam-knot to begin the thread wraps.
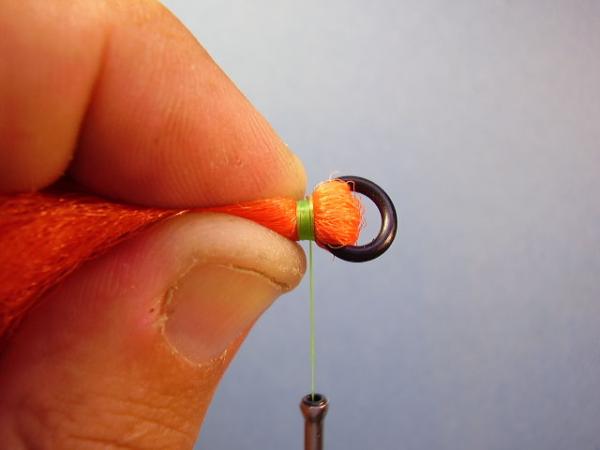
Continue to wrap a wide and tight thread neck behind the o-ring.
Once you have a substantial thread neck, whip-finish and cut the excess. You'll also need to clip the excess tag end from the jam knot.
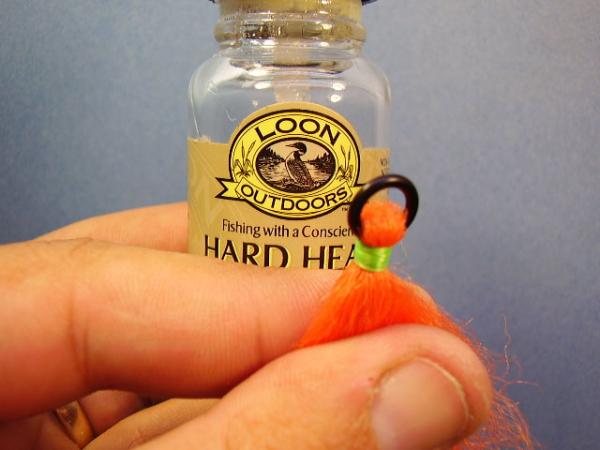
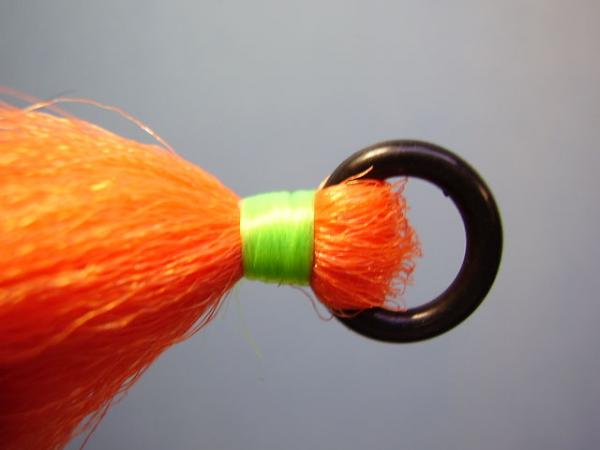
Coat the thread with a high quality head cement such as Loon Outdoors' Hard Head.
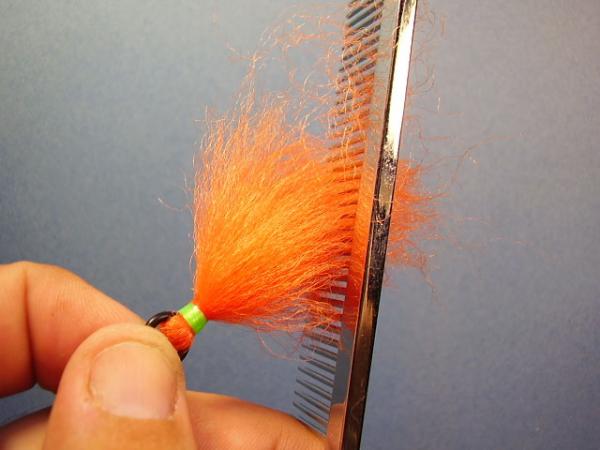
Comb through the nearly-completed indicator one last time...
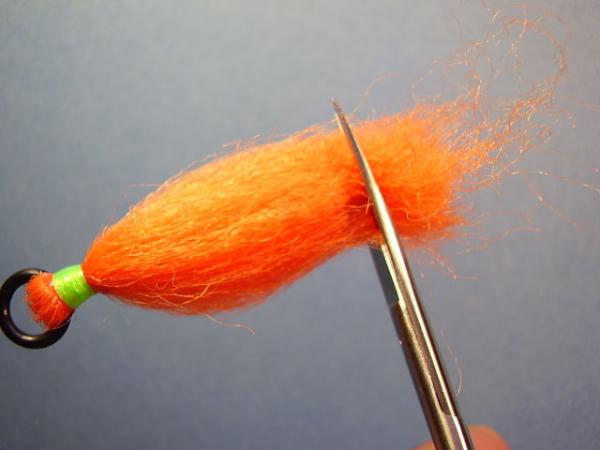
With sharp scissors, clip a square top trimming the indicator to your desired length. Over time I have begun clipping them shorter and shorter for easier casting. Short ones float just as well and are just as visible.
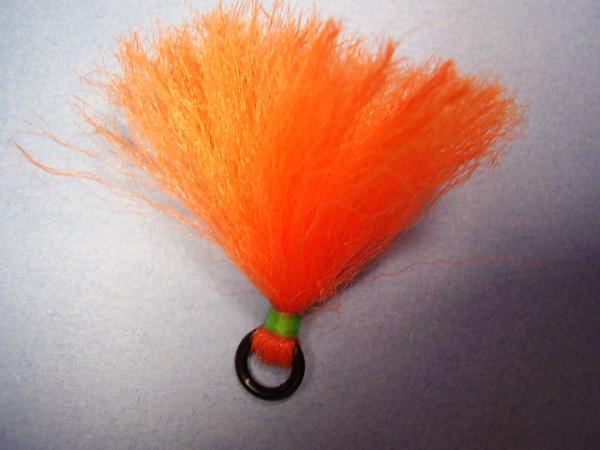
Notice how the indicator assumes a distinct conical shape. This is what you are looking for. If you wish, you can fish with the indicator as is. I prefer to make a bunch and proceed with the following steps.
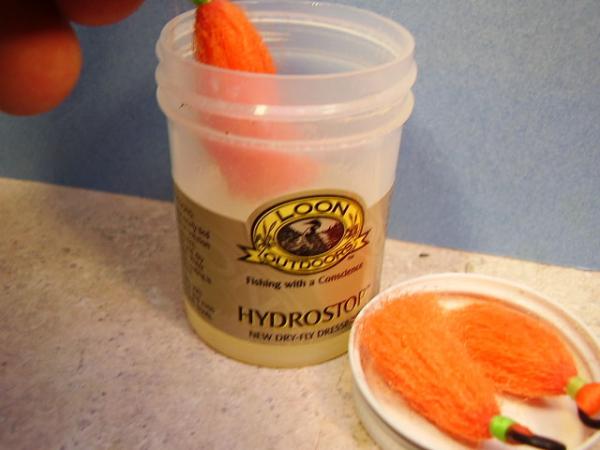
Dip each trimmed indicator into a quality liquid waterproofing agent like Loon Outdoors' Hydrostop Saturate the entire indicator then remove the excess with your fingers.
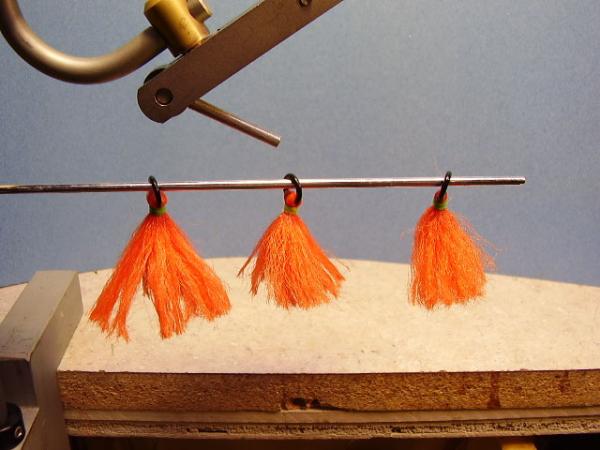
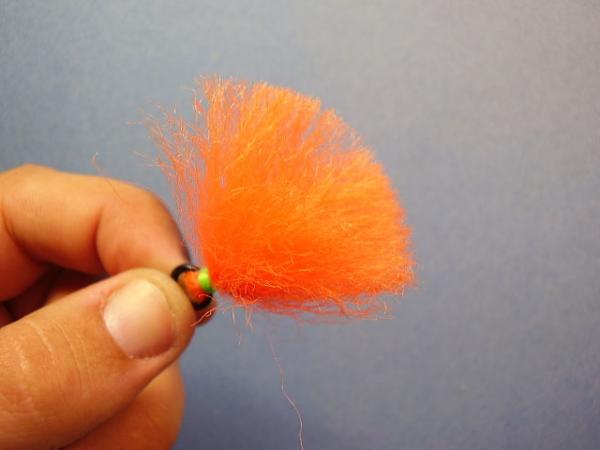
Shake the indicators a bit and then comb through them to loosen the individual fibers. Then, hang the indicators overnight to allow the waterproofing agent to dry. Once dry, give them one last brushing to fluff them up.
To apply the indicators, simply form a loop in your leader at the desired distance above the fly. Slide the loop through the o-ring and over the indicator then tighten. The other option, when fishing deep or uniform depth water, is to tie your butt section directly to the o-ring using a clinch knot. Then with another clinch knot around your butt section, secure your tippet and slide it down to the indicator forming a right-angle leader.
Even though the indicators have been pretreated with a waterproofing agent it will still be necessary to add fly floatant occasionally throughout the day. Be sure the indicator has that conical shape in order to maximize it's floatation and sensitivity.
Note: These will NOT work well under freezing conditions. If icing is an issue it is far better to use a balloon, foam, or balsa indicator.