Archives of Loren Williams Fly Tying Tutorials.
Whip Finish
Tying and Photos by Loren Williams
With the myriad of whip finish tools available today, many folks quiz me as to why I still finish my flies by hand. There are a number of logical reasons:
- I will never loose my hands on my tying bench.
- I will never have to pick up and put down my hands.
- I can put a whip finish anywhere on the hook with ease.
- I can be very precise with the placement of each whipping loop.
- I can whip finish on multiple planes.
- I can whip finish on TUE hooks.
As a production tyer, the first two reasons the most important. Like any skill, choosing to learn the hand whip finish will allow you to grow as a tyer simply because you are becoming more versatile. The less dependent you are on picking up and putting down a tool, the more efficient you will be as a tyer. With efficiency comes a better understanding about the construction of the flies you are tying and you will see improvements to your tying speed, fly quality, and fly durability.
As you work with this tutorial, let me suggest you use a very large hook and some substantial tying thread. In the photos I am using 30# dacron backing for illustrative purposed, but it will work well to learn with too. The "hump" about learning the whip finish is how to manipulate your fingers as you lay each whipping loop. It is best to practice laying loops in succession in order to develop the muscle memory. Once you can lay the loop without thinking, then you can progress to drawing the whip finish tight. With discipline, you cam learn this skill in 5 minutes and master it in an evening.
Click on photos to enlarge!
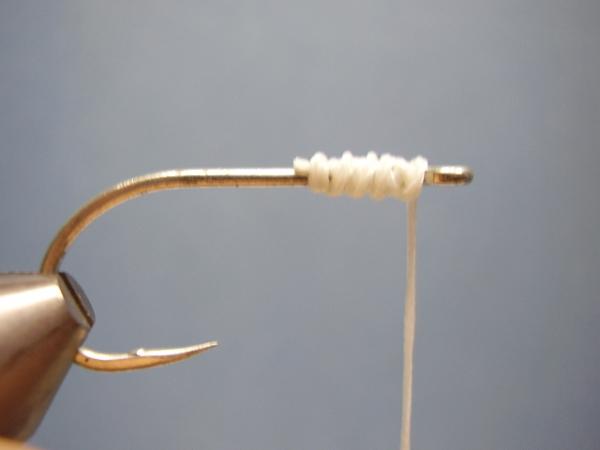
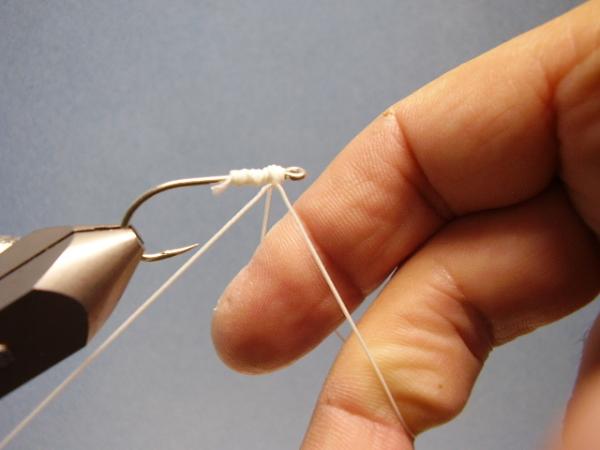
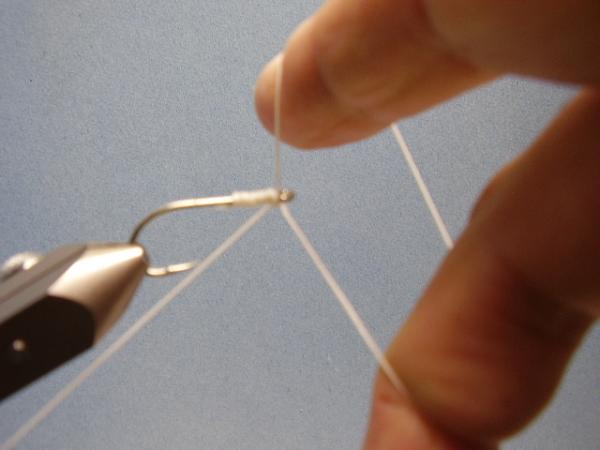
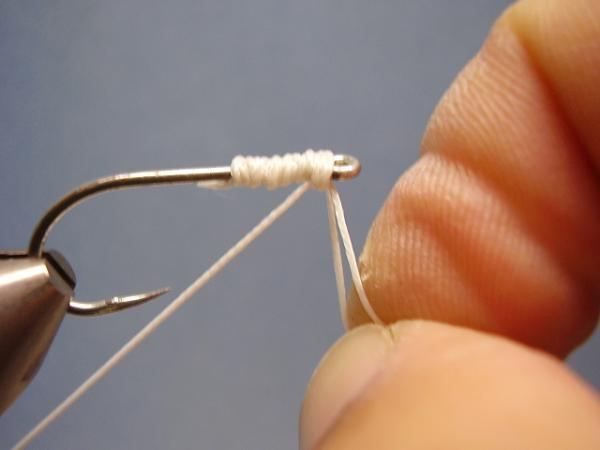
Place a very large hook in your vise and start some heavy tying thread. Try to stay near the eye, but exactness is not needed.
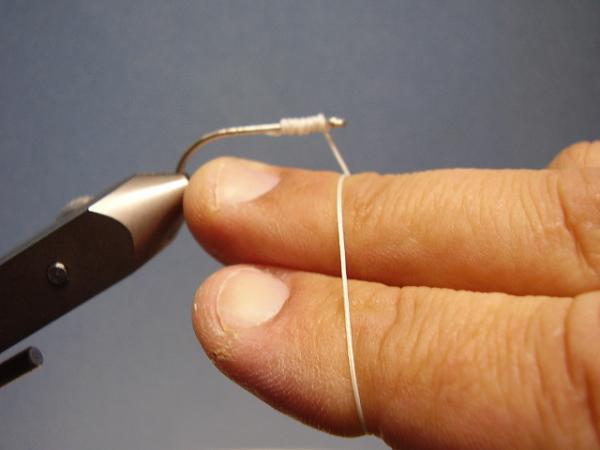
Using your bobbin hand, extend your index and middle finger to point toward the vise jaws on top of the thread and wrap the tying thread around your fingers one time.
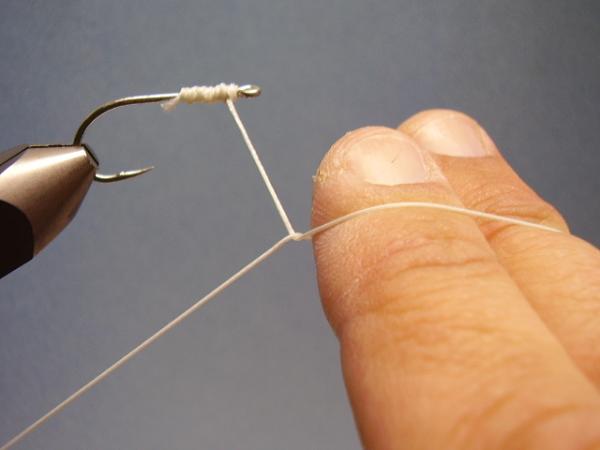
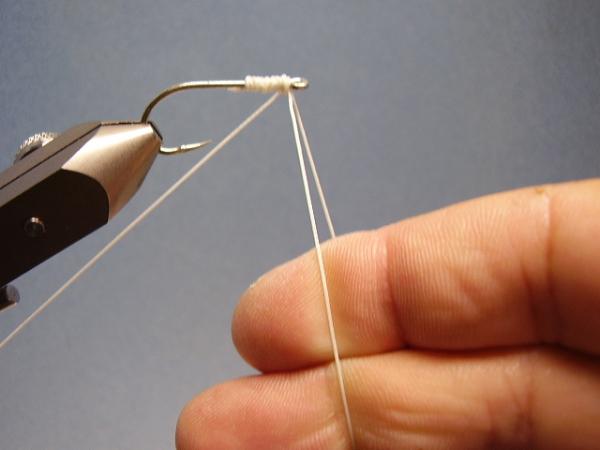
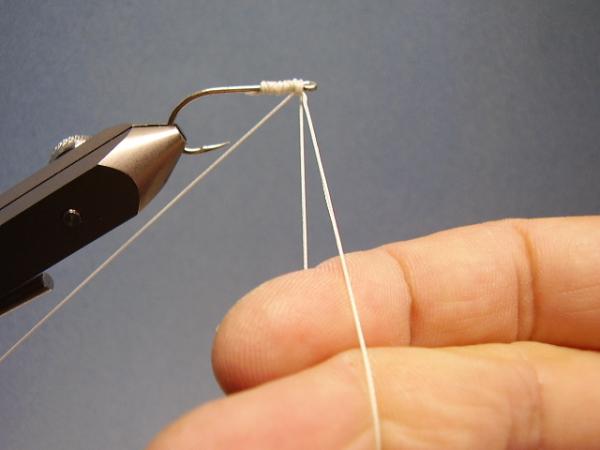
Rotate your hand so that your finger are now point straight away and the thread intersection is to the left as shown.
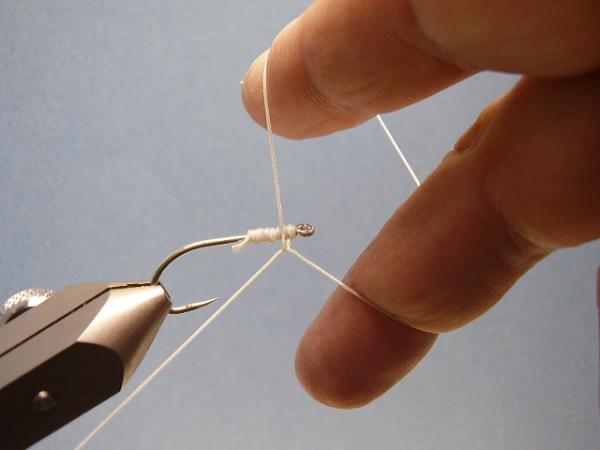
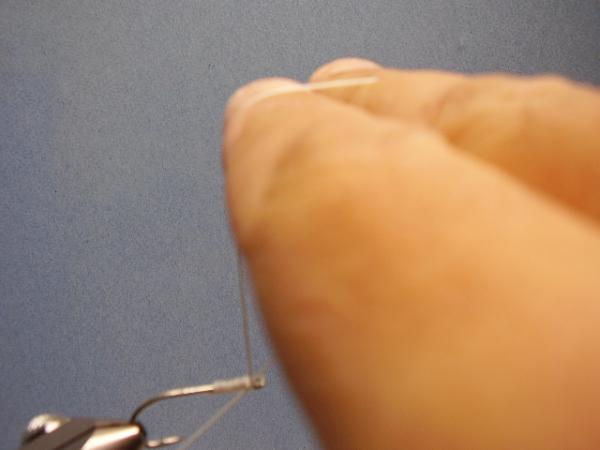
Now, spread your fingers so that your index finger is above the hook and your middle finger below. Be sure to keep your middle finger on YOUR side of the hook shank at all times!
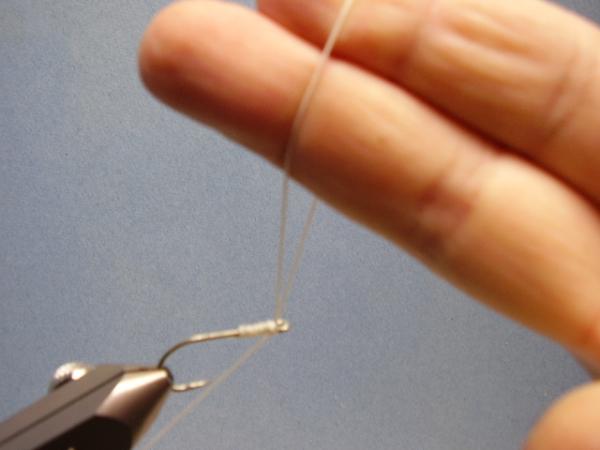
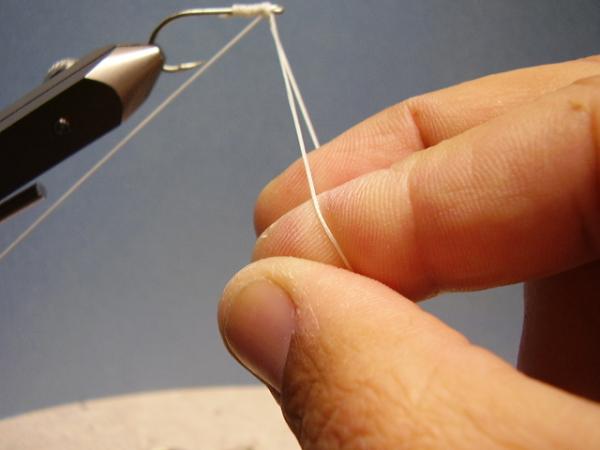
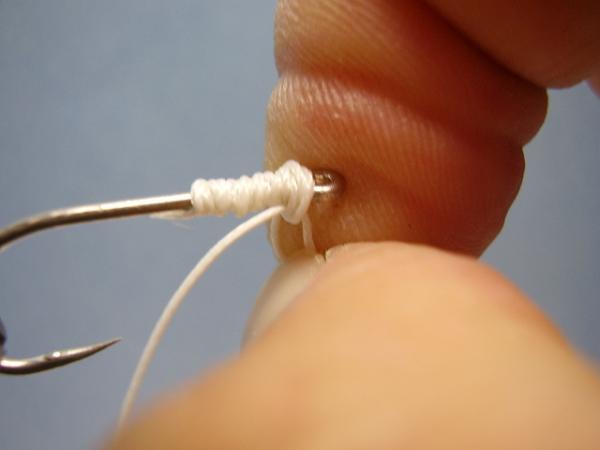
Look at the photo and see how the thread intersection has slid toward the hook shank.
Keeping your middle finger on your side of the hook and below the shank, use your index finger to push the loop around the shank as shown.
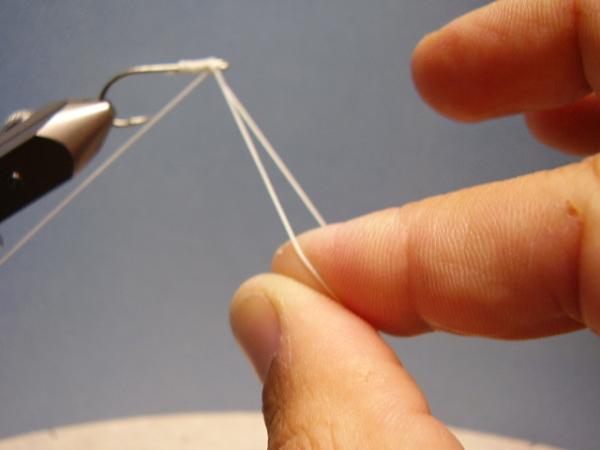
Allow your fingers to come back together below the shank.
Keeping your fingers together, rotate the loop to a position above the hook shank, but still on your side of the hook.
Point toward the wall in front of you as before...
Split your fingers, remembering to keep the middle finger below and inside the hook, to slide the next thread intersection to the shank.
Once the intersection is against the shank, toss the loop over the shank with your index finger exactly as before.
Allow your fingers to come back together below the hook.
Note: Please take the time to repeat the above steps as many times as needed until you can toss the loop, form another and toss it, without thinking. It does not matter if you lay 100 loops--take the time to dedicate this process to muscle memory before proceeding!
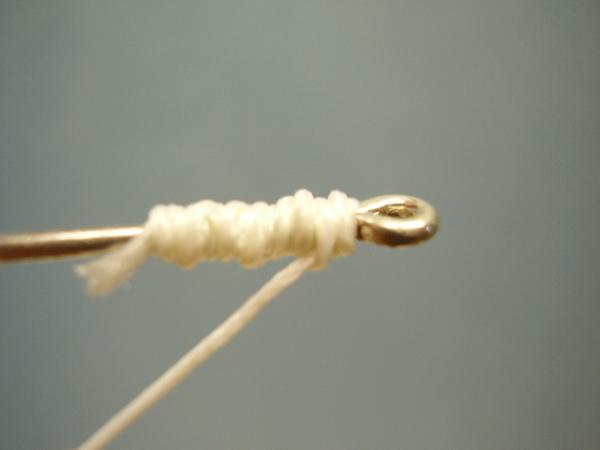
After you have tossed your final whipping loop (I use 3 or 4), pinch the loop that is now below the hook shank between your thumb and index finger.
Remove your middle finger. Using your non-bobbin hand, draw the thread to the rear of the hook, while using your bobbin hand's thumb and forefinger to maintain tension on the loop as it is drawn close.
As the loop continues to close, shift the tension from the pads of your finger toward the very, very tips. This will allow the loop to close under tension and prevent your fingers from becoming trapped.
This is important: if you lose tension, real tying thread will twist on itself, creating a knot that will break before the whip finish is completed.
Maintain tension all the way to the very end.
Pull the thread loop from between your fingers and watch it draw under the loops of your whip finish leaving you with a very secure knot.